Templates
Templates were added in version 2.0. Refer to the change log for full release details.
Templates let you separate the shell around your rows from the content of each row, so your measures only need to produce per-row markup.
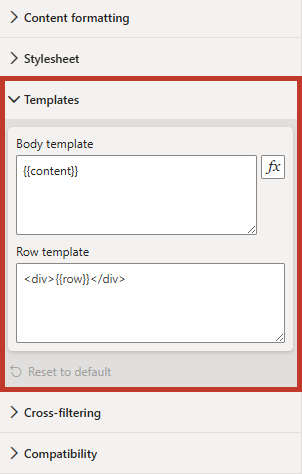
Body Template
The body template wraps all rows. Put your header, grid or container element, and any shared <style> blocks (if not using the stylesheet) here. Mark where the rows are injected with the {{content}} token, e.g.:
<h1>Sales by Country</h1>
<div class="rows">{{content}}</div>
The body template can be static text, or driven by a measure - click the fx (conditional formatting) button on the property to bind it to a measure, so the shell can react to your data. The Stylesheet property supports the same binding.
Row Template
The row template wraps each row. The {{row}} token marks where that row's value goes, e.g.:
<div class="card">{{row}}</div>
Use {{row}} on its own when your per-row measure already returns the row's outer element.
An authored row template always takes precedence over the default row structure - even when legacy (v1) rendering is enabled.
Render Order
The body template renders first, then the rows. If you are using scripting in the Regular edition, define shared functions in the body template; per-row scripts can then call them - see Scripting for the recommended pattern.
Putting It Together
A typical layout using both templates:
- Write a per-row measure that returns one row's HTML, and return
BLANK()for rows you don't want rendered - the visual drops them instead of leaving an empty slot. - Bind the data - the measure goes in Values and your grouping column in Context.
- Set the Body template, including
{{content}}where the rows go. - Set the Row template -
{{row}}if the measure returns the row's outer element already. - Optionally add a Stylesheet, and enable cross-filtering so a click on an entry filters the rest of the report.
You can refer to the Simple Worked Example for a walkthrough of this, with a downloadable sample workbook.